Main Menu

Intuitive user interface that makes CADI® easy to use

Advanced presentation features for patient interactions
Easily acquire, store, access, and present all your x-rays and images on a SINGLE platform

125,000 satisfied users worldwide

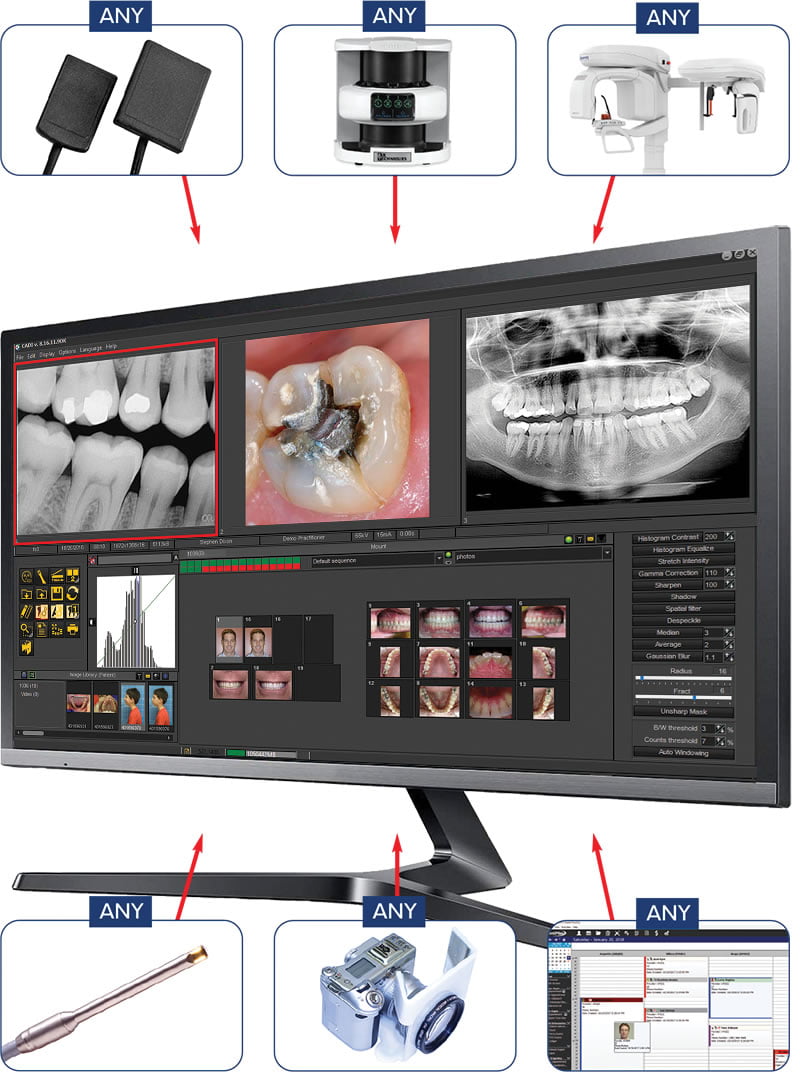
Use ONE imaging software for all your sensors and any other imaging equipment
The CADI® interface is designed from the perspective of a dentist – not a programmerYou have invested in digital x-ray, intra-oral cameras, digital cameras, documentation of your cases. CADI® is designed to build a relationship of trust with your patients by providing simplified patient co-diagnosis and treatment presentations. CADI® offers you a solution to:
|  |
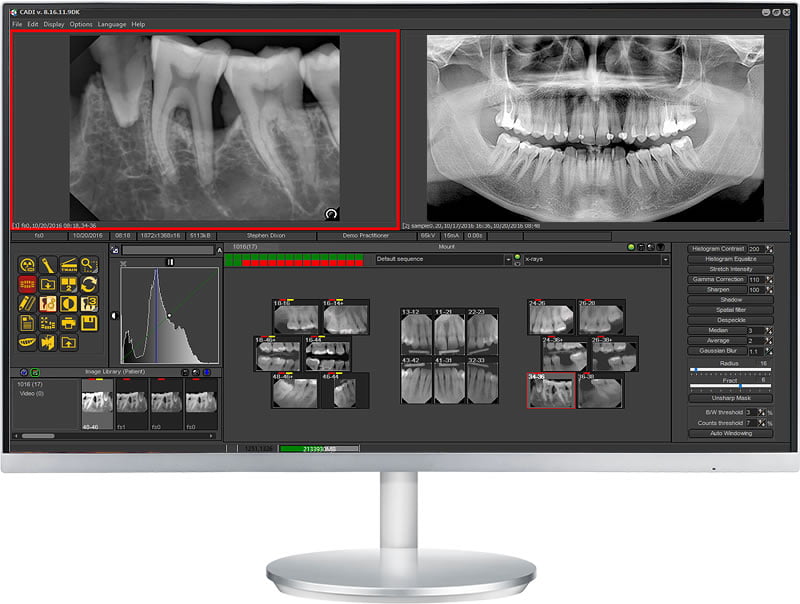
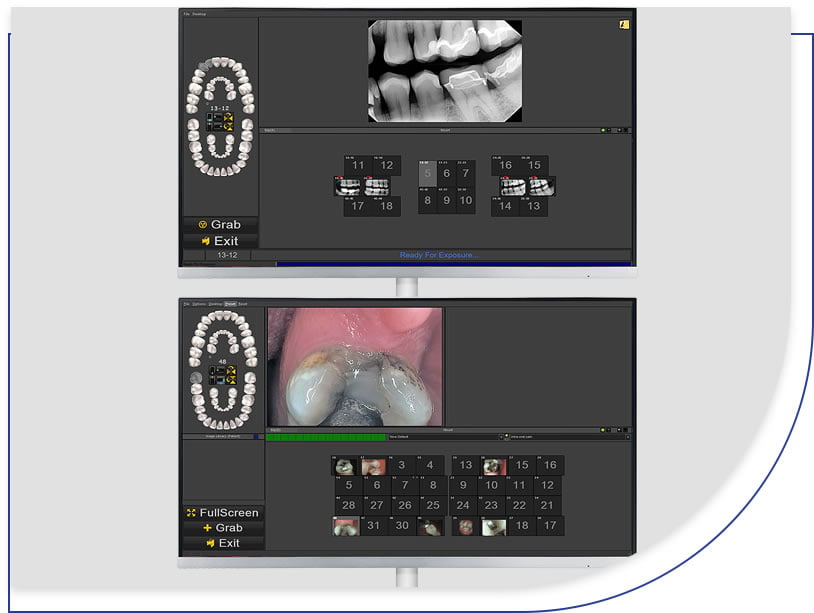
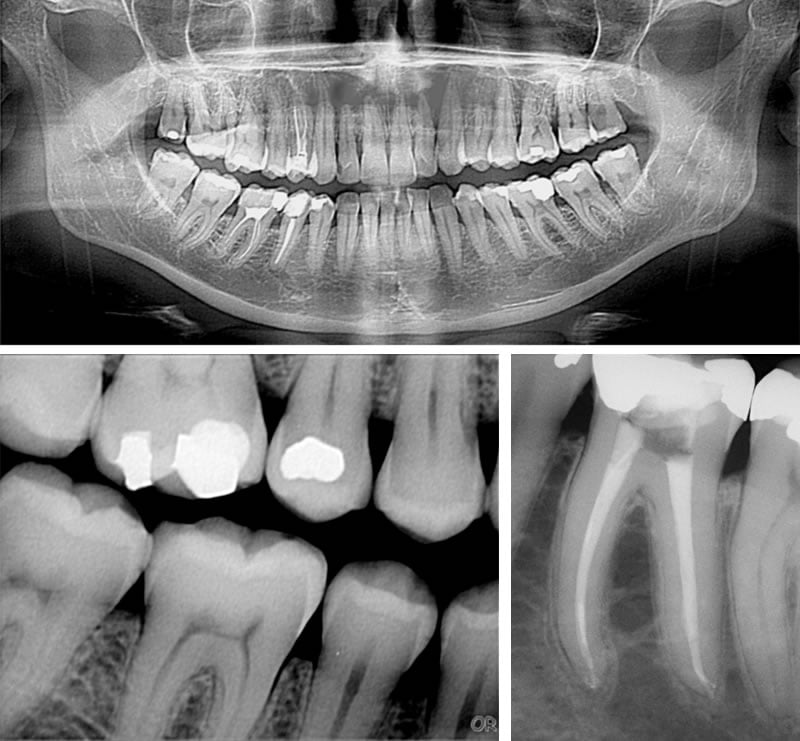
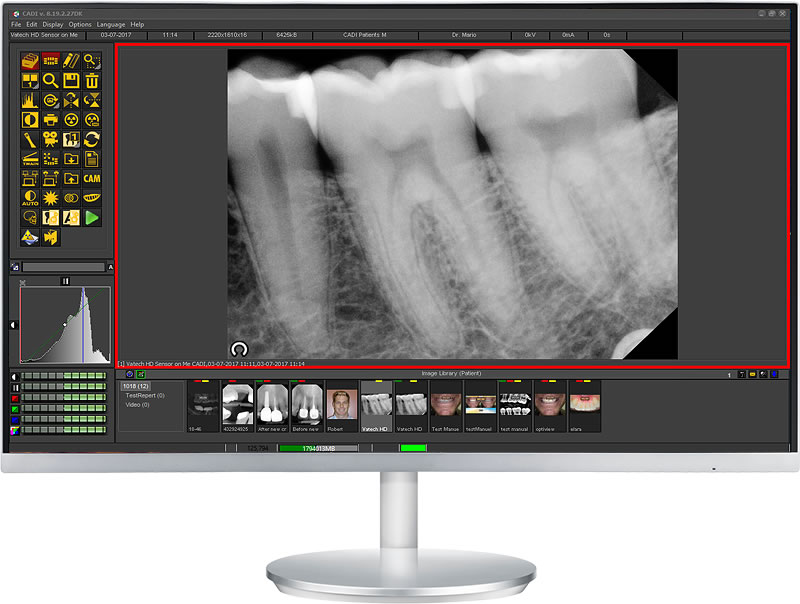
| CADI® uses powerful tools commonly found in medical imaging to bring optimal results with any digital equipment. CADI® keeps all the raw data from the x-ray sensor and uses a powerful 16-bit viewer and the unique Windowing tool permits the user to interpret different grayscale representations “Windows” of this data. Eliminate the parts of the image that don’t contribute to diagnostics. This allows CADI® to offer extraordinary image quality with a variety of brands of sensors and phosphor plate systems.
|  |
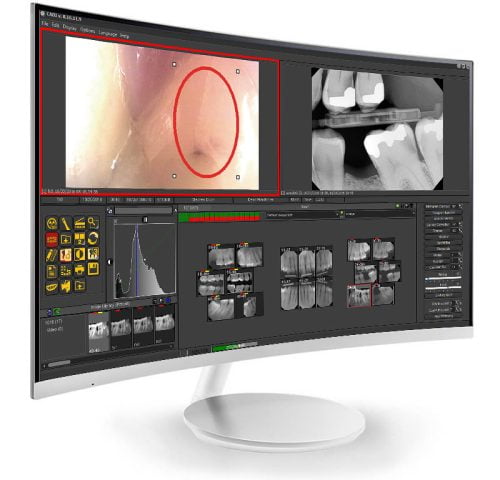
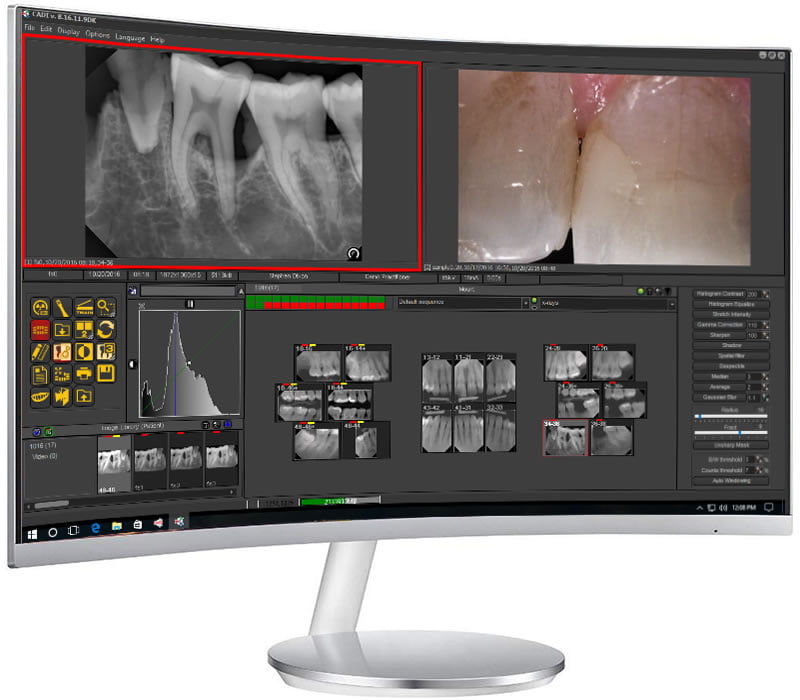
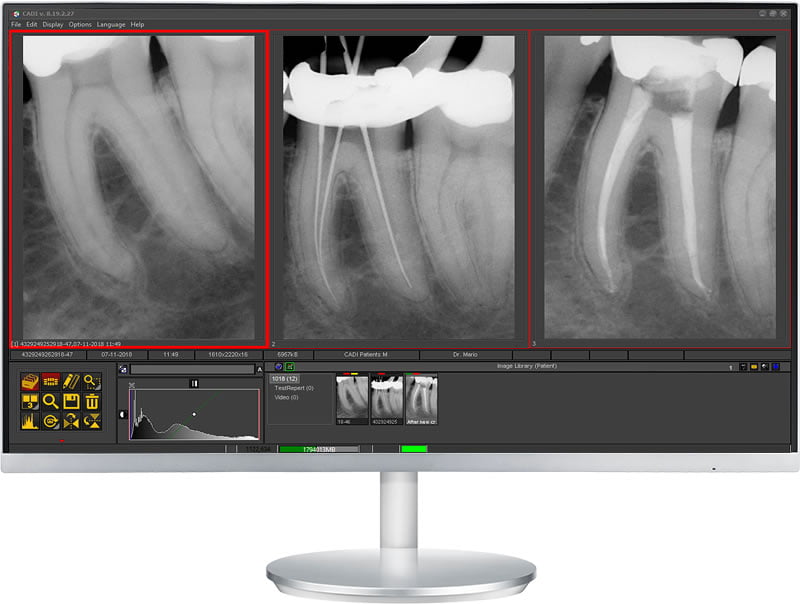 ENDO: Various combinations of images can be viewed simultaneously with measuring tools and zooming capabilities. | 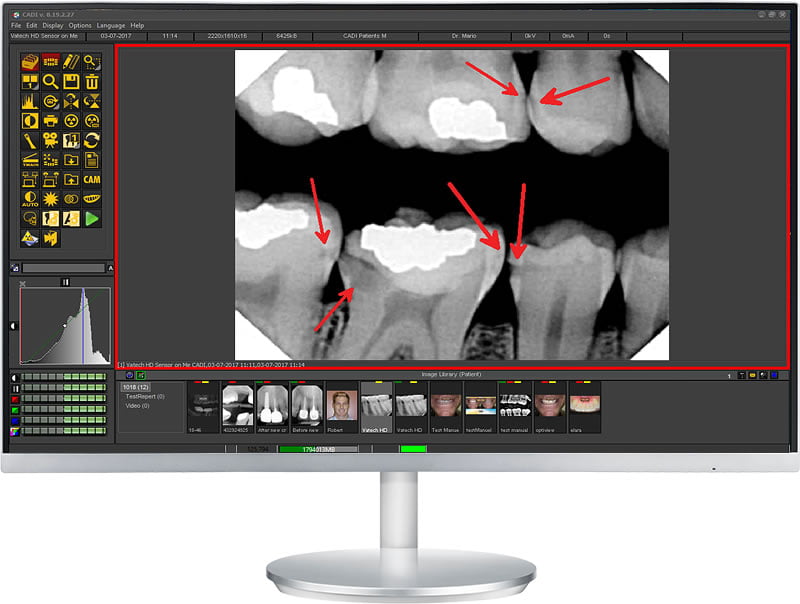 “I have how many cavities???” Gain objective instant credibility with new emergency patients. |
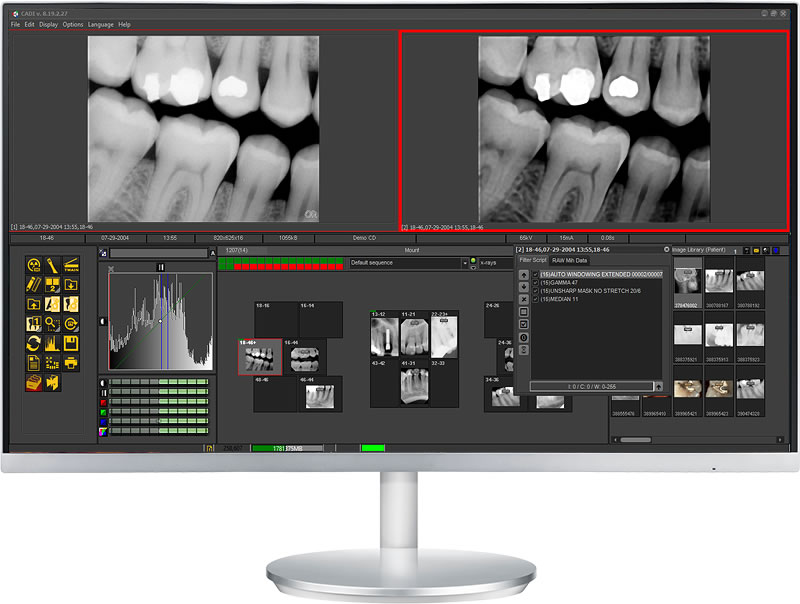
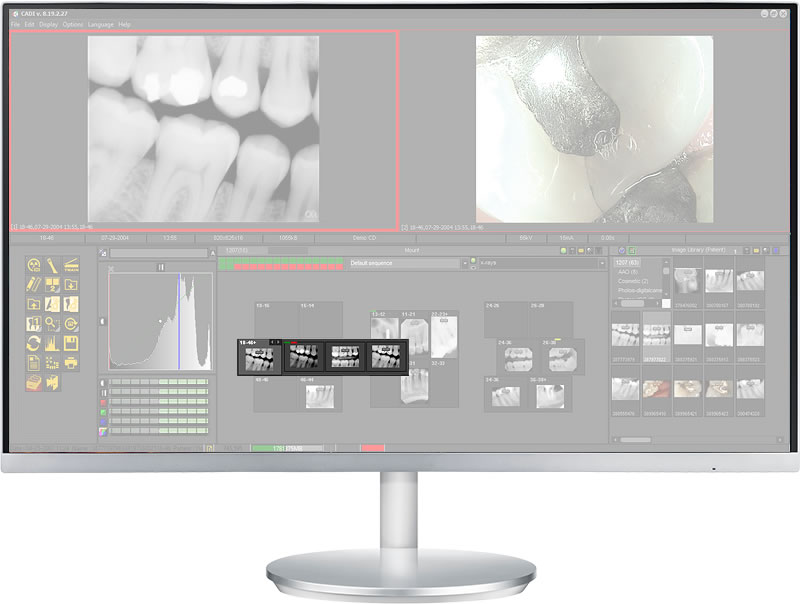
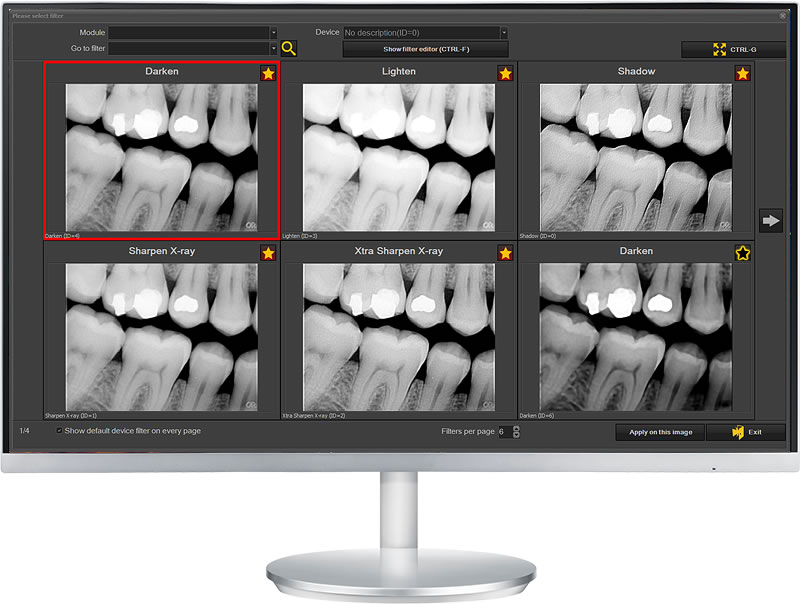
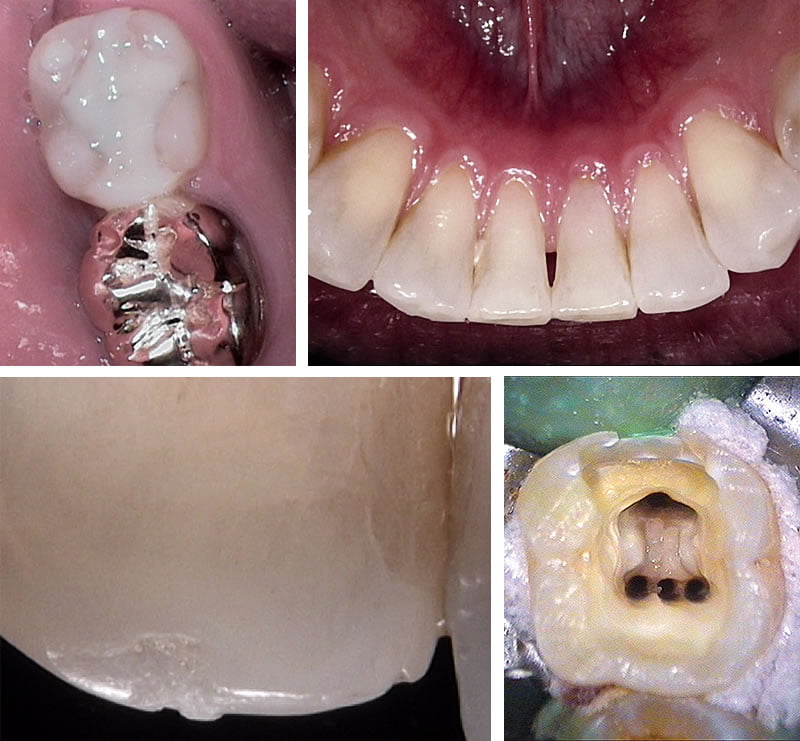
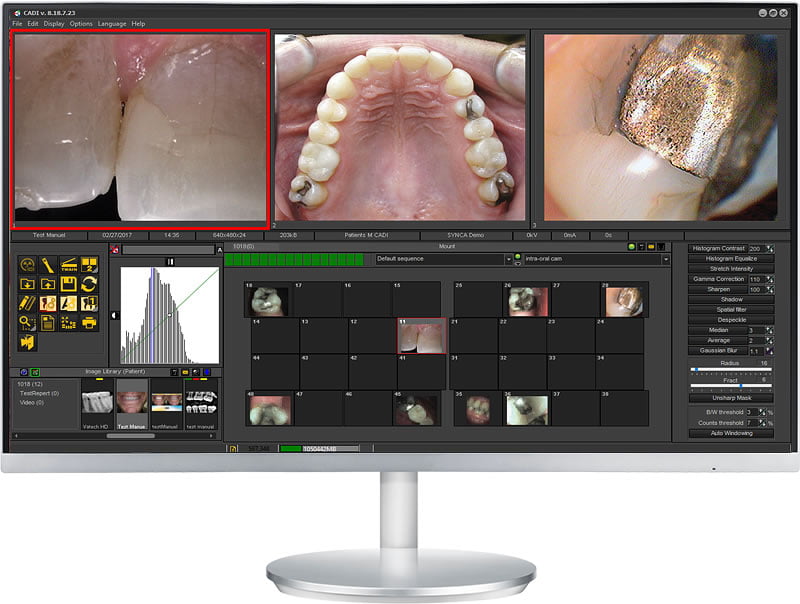
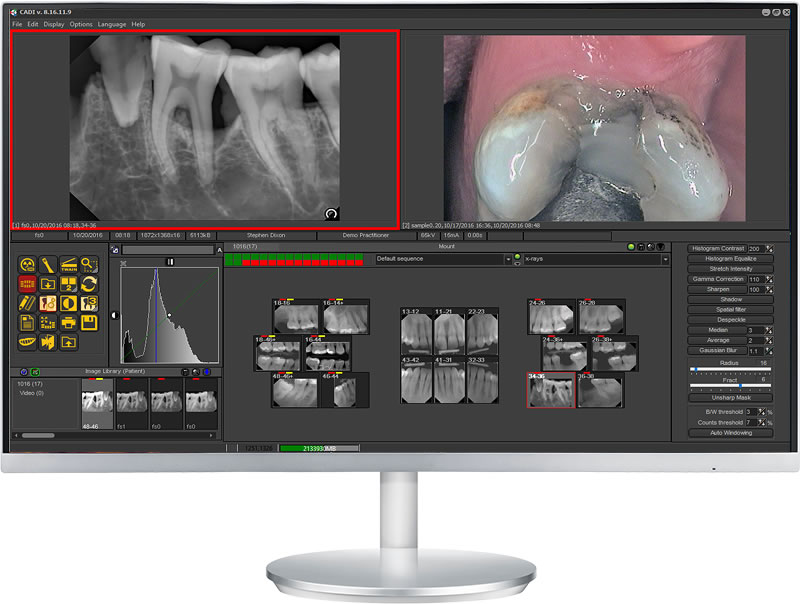
| Use pre-set or customizable x-ray real-time filters to visualize the most diagnostic images possible. The raw image data is always available, so you can unclick a filter at any time. Click on the “Filter” window and simultaneously zoom to view 6 different filtered images.
|  |
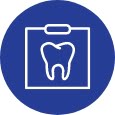
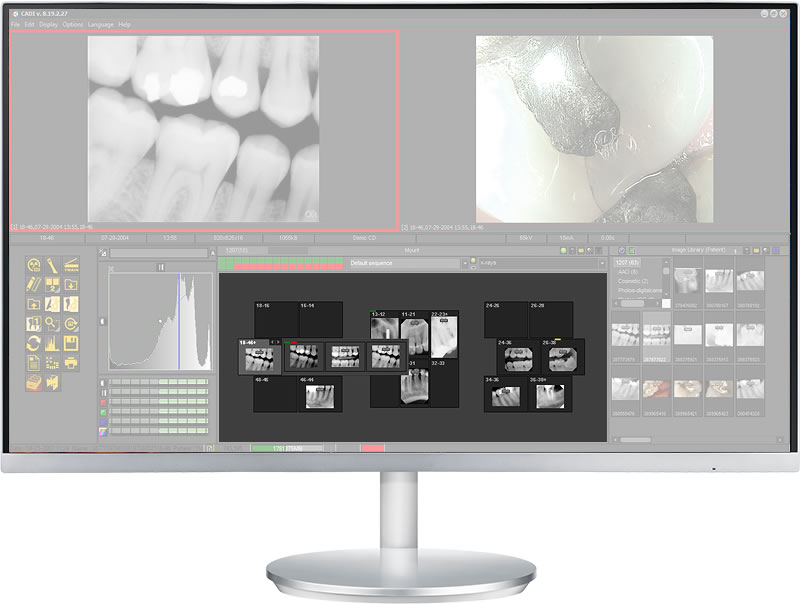
That include exam selection and tooth history viewsFrom a single status-mount (preconfigured or customizable), you can select a preconfigured intra-oral x-ray exam (number of teeth, tooth numbers, orientation and order). Images are all stored in a single multi-depth mount. View the current exam, x-rays of any tooth, and history of x-rays on that tooth.
|  |
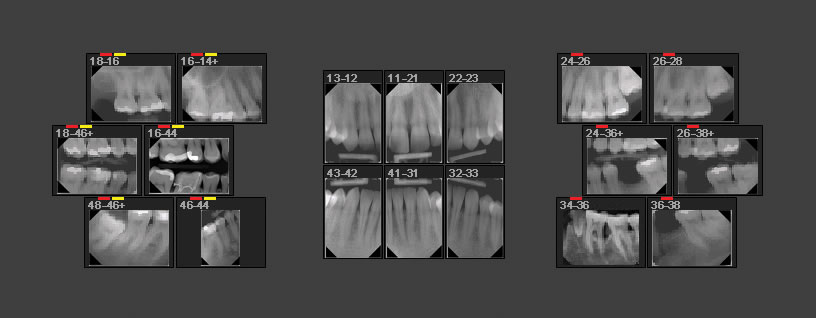 X-ray mount | 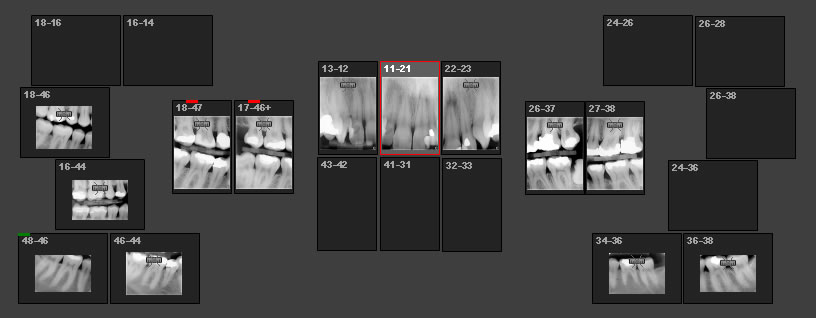 Vertical bitewing x-ray mount | 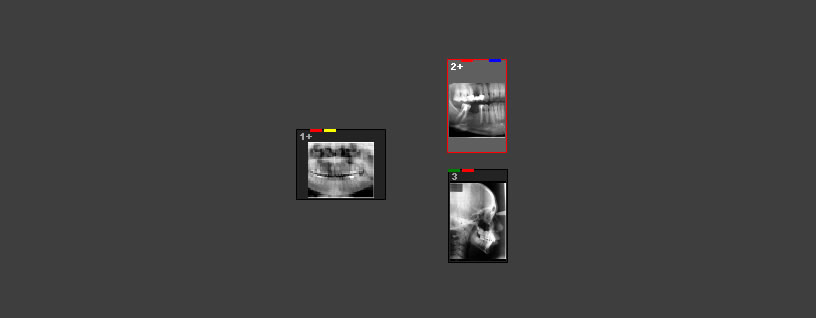 Pan & Ceph mount |
 Intra-oral camera mount | 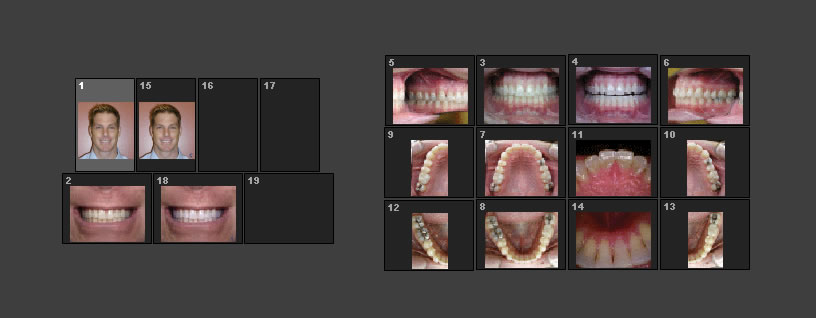 Digital camera mount | 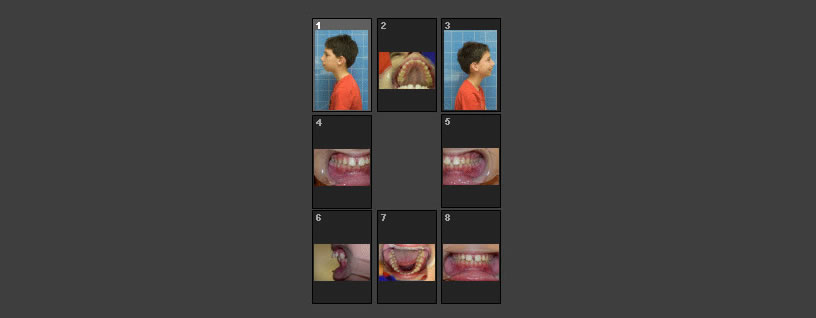 Ortho mount |
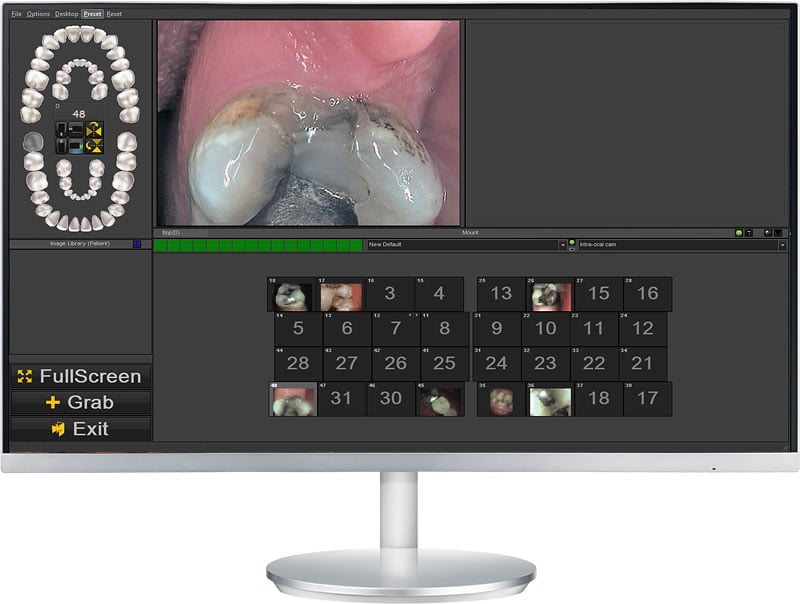
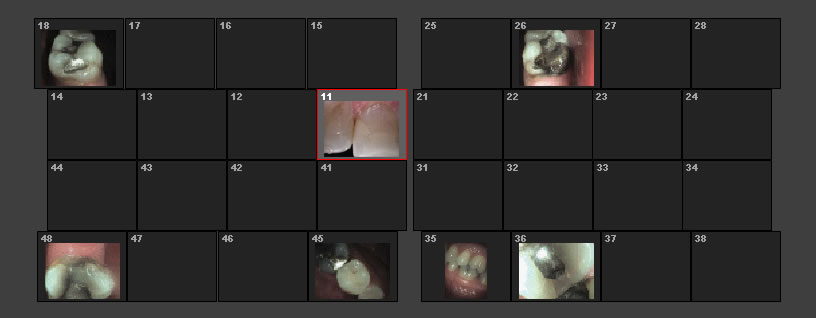
Acquire, store, and view intra-oral camera images by tooth numberClick on the tooth in the status-mount and images are tagged and stored in the tooth in the mount. Use a CADI-customized intra-oral camera and move through the mount to take and intra-oral camera exam of all problematic pathologies for case presentations.
|  |
 |  |
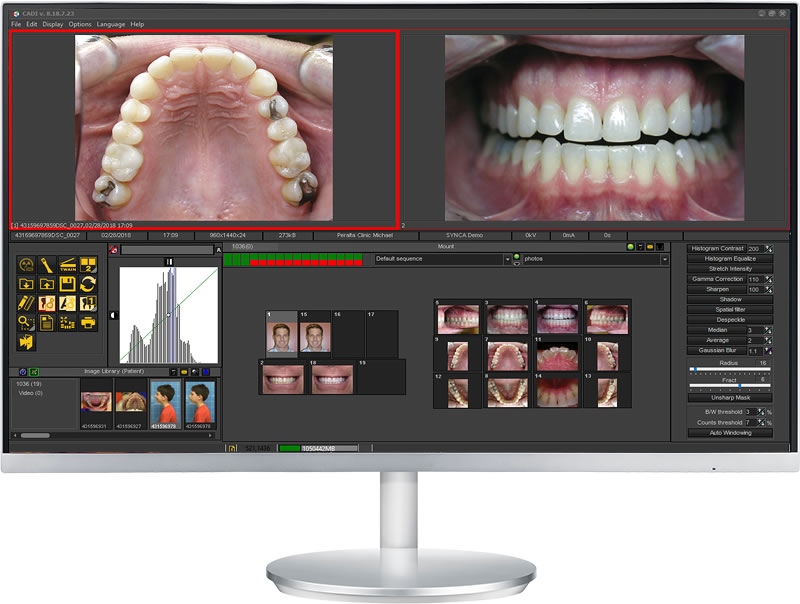
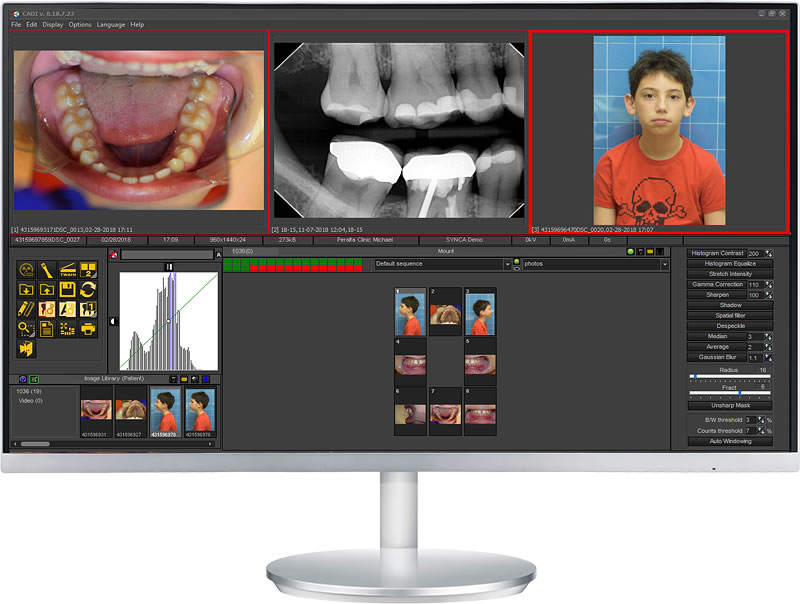
| Set up your new patient exam, or use the AAO status mount for orthodontic cases and automatically import digital camera images for easy storage and viewing.
|  |
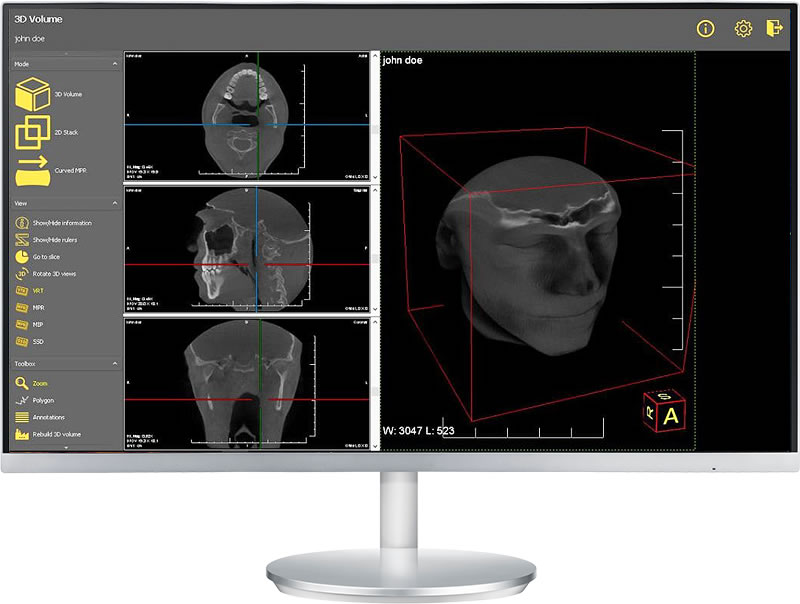
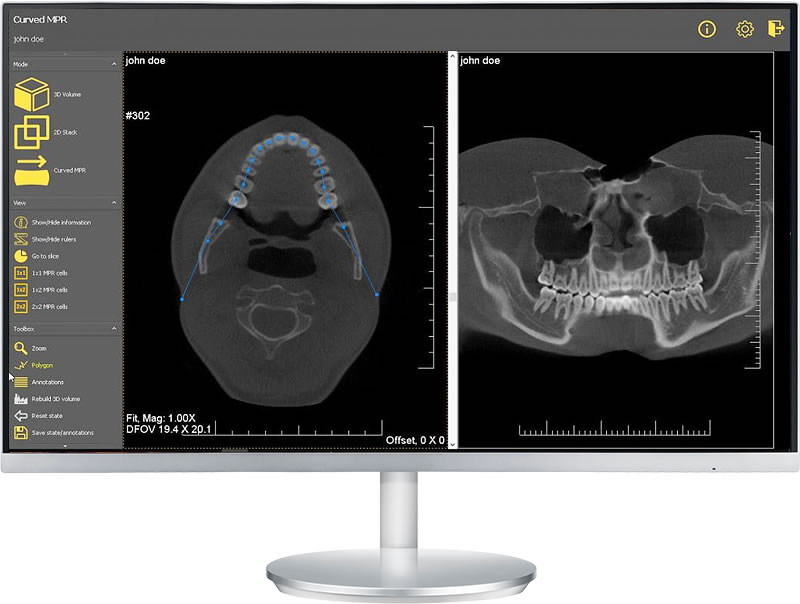
CADI add-onFrom the CADI® patient main screen, you can launch your 3D imaging software. Use the inexpensive CADI® 3D Viewer to view images on different workstations. Open 3D images in CADI®. The 3D Volume viewer provides 4 different volume construction techniques: MPR, VRT, MIP and SSD. With the 2D stack overview, navigate through the images or different slices. Reconstruct a panoramic image by using the MPR/panoramic polygon feature.
|  |
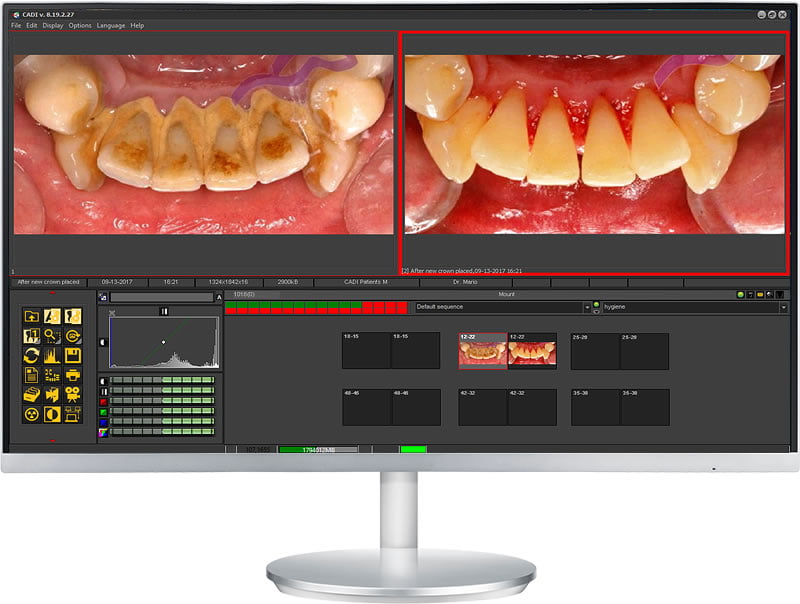
| Store case images and x-rays in a Global Library that you can easily access from any patient file. Use to explain treatment recommendations and step-by-step procedures. Show before and after images and x-rays. | 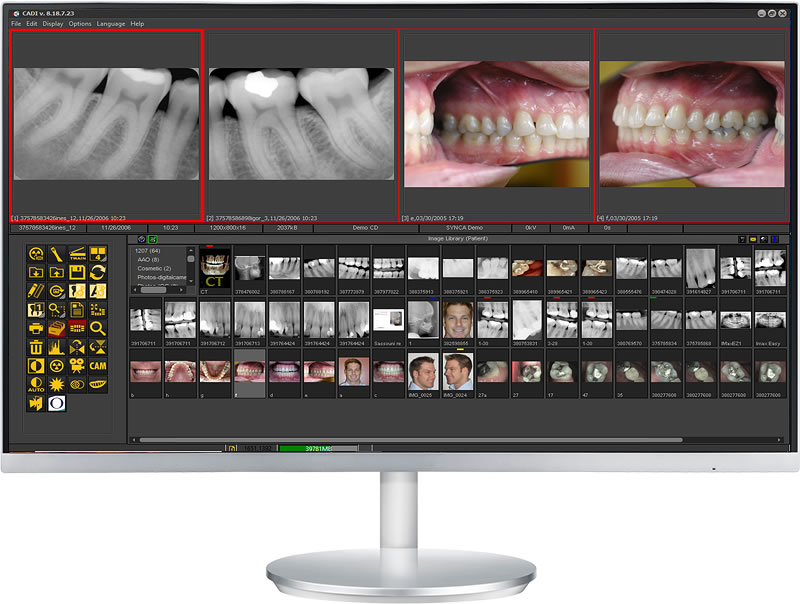 |
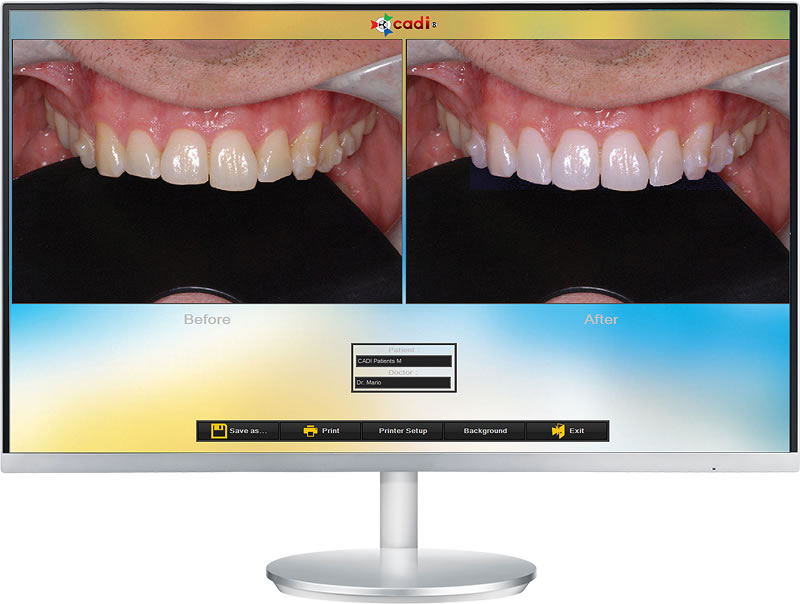
| Help your patients visualize the potential results of whitening and cosmetic procedures.
|  |
Full screen view, and unlimited customizable desktopsCADI® provides you with 5 switchable desktops that are designed for fast and accurate diagnostics and subsequent patient co-diagnosis. Easily retrieve images and x-rays for display in a variety of formats. | 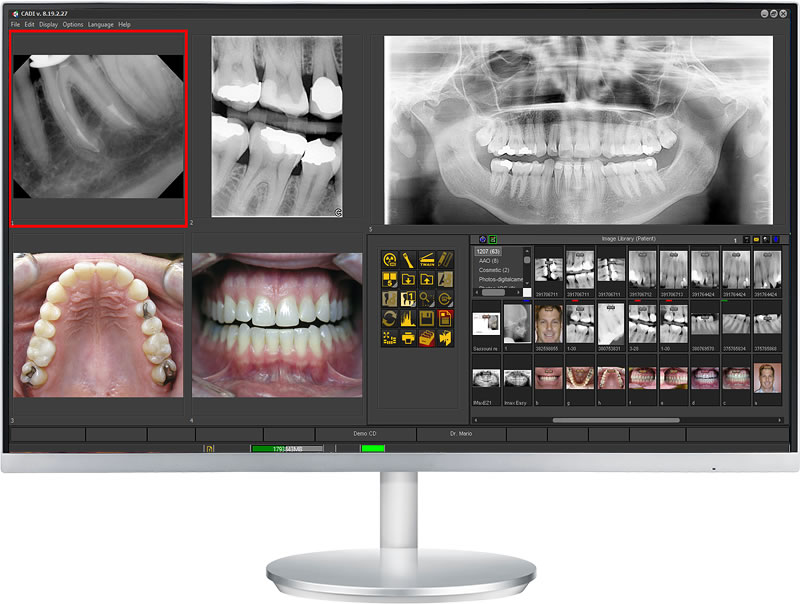 |
 |  |  |
| Set up templates for any variety of applications and save them for routine use. Then simply drag and drop any images and x-rays into the template. Print to paper or email. | 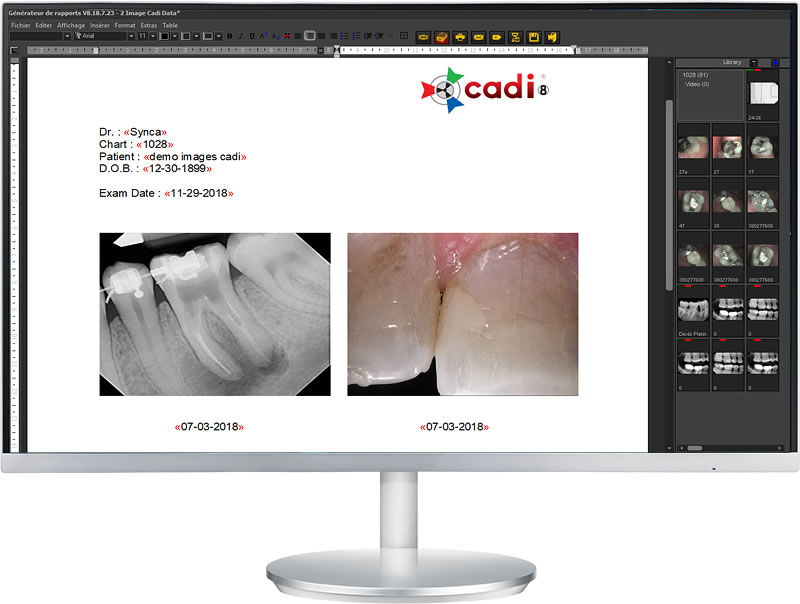 |
The Implant module contains a library with 25 different brands of implants. Transpose the desired implant over your image to help determine width and depth for optimal treatment plans. | 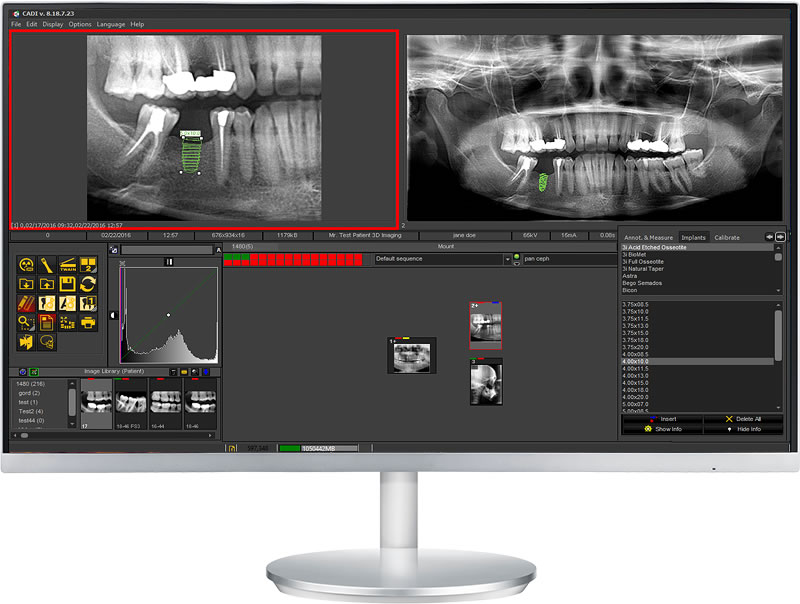 |
<table style=”border-collapse: collapse; width: 100%;”>
<tbody>
<tr>
<td style=”width: 50%; padding: 50px; vertical-align: top;”>
<h3 style=”text-align: left;”>CADI add-on</h3>
Just enter the DFO module, set all the points needed to complete your analysis and your analysis will be automatically calculated and drawn on screen. No need to spend a large amount of time on drawing and calculating. With the DFO module it is easy to perform all kind of analysis.
<div style=”height: 20px;”></div>
With our optional Analysis Editor, you can build your own analysis from scratch or from any existing analysis. With our scripting technology, you can even display text, drawings on the analysis for better viewing. Combining measurements from dif-ferent analysis is done in a couple of clicks. You can export your analysis to every DFO user to let them use your analysis.
<div style=”height: 20px;”></div>
<img src=”https://www.synca.com/wp-content/uploads/2023/09/screen_dfo2.jpg” /></td>
<td style=”width: 50%; padding: 50px; vertical-align: top;”><img src=”https://www.synca.com/wp-content/uploads/2023/09/screen_dfo1.jpg” />
<div style=”height: 50px;”></div>
<img class=”aligncenter size-full wp-image-15185″ src=”https://www.synca.com/wp-content/uploads/2023/09/screen_ortho1.jpg” alt=”” width=”800″ height=”604″ /></td>
</tr>
</tbody>
</table>
CADI POM (Peace of Mind) is a comprehensive program to supply state of the art x-ray and imaging software, as well as service, support and discounts for all your x-ray and intra-oral camera products.
Software value of up to $8000, upgrade maintenance value of $1000 per year
There is no need to buy your imaging software up front. You will be supplied with a license to use CADI on all your workstations. In addition, the programming team works continually to improve and update CADI. You not only benefit from new features, but you also maintain your x-ray and imaging system compatible with the continual changes in dental imaging equipment, PCs and networks, and the Windows operating environment.
Value of $112 per call/issue
Your CADI technical support team will provide you with unlimited technical support calls to deal with all issues related to the satisfactory operation of your CADI software and imaging and x-ray equipment used on the CADI system. Note that some issues relating to the functioning and troubleshooting of non-Synca x-ray and imaging equipment must be resolved by the respective equipment vendor.
Value of $250-$500 per incident
For X-ray sensors, intra-oral cameras and other imaging equipment that is repairable, both during and post-warranty, you will benefit from a free loaner product, while your existing product(s) is being serviced. An identical or similar product will be provided for the duration of the repair.
You will receive: Free shipment of loaner equipment to your office, free return of your defective product to Synca, free shipment of your replacement product to your office and a free return of your loaner product to Synca.
Minimum value of 15% off the already low direct purchase price
Should you experience failure due to accidental damage or other non-warranty failure, you can exchange your defective product for a new product with a new warranty at a special discounted price.
Minimum Value of 5% off the already low direct purchase price
You may purchase digital x-ray sensors, intra-oral cameras, and extra-oral imaging equipment at low direct prices and, as a POM client, you will receive an additional discount.
How to enter practice information in CADI Data (2:45 min.) | Add or search a patient with CADI Data (3:12 min.) | How to enter a patients’ profile picture into CADI Data (1:08 min.) |
How to search for patients or images via CADI Data (1:12 min.) |
CADI screen layout descriptions (2:20 min.) | CADI basic functions (3:51 min.) |
How to acquire patient x-rays in CADI (5:37 min.) | Emergency x-rays in CADI (3:23 min.) | How to acquire x-rays using a phosphor plate system with CADI (1:20 min.) |
How to acquire Pan x-rays with CADI (1:14 min.) | How to acquire 3D CT images with CADI (1:10 min.) | How to acquire & use intra-oral camera images in CADI (4:16 min.) |
How to acquire & use digital camera images in CADI (5:03 min.) | Taking digital camera images in your practice (3:06 min.) | If you acquire images in the wrong patient (3:02 min.) |
X-rays filters (8:05 min.) | Additionnal x-rays filters (6:35 min.) |
How to use the Global Library and the Patient Library (5:34 min.) | How to delete images from CADI (2:12min.) | Annotations, Implant Stenciling & Measurements in CADI (6:58 min.) |
How to reoriented images in CADI (3:22 min.) | Full screen mount function in CADI (4:03 min.) | Classic print function in CADI (2:15 min.) |
Importing images into CADI (4:07 min.) | How to search for specific patient images in CADI (7:18 min.) | How to export images – from the menu bar (4:00 min.) |
How to export images – from the icon tools (2:38 min.) | How to stream video with CADI (3:11 min.) | How to create a “Macro” in CADI (4:43 min.) |
How to use the Whitening Simulator (4:34 min.) | How to create a Cosmetic Simulation using the Natural Smile Library (6:15 min.) |
General settings overview in CADI (9:27 min.) | Exploring the options of CADI display menu (10:56 min.) | Create or modified a Mount series in CADI (6:46 min.) |
Customizing Desktops in CADI (10:54 min.) |